Without a doubt, one of the first things people notice about a vehicle is the paint job. That's why paint correction is so important–it can mean the difference between an average detail and one that really pops.
But paint correction isn't just about buffing out scratches and swirl marks. It's an art form that requires the right tools and products, techniques, and understanding of the paint itself to deliver stunning, long-lasting results. Plus, each car and truck is unique, which means you’ll have to account for factors like paint hardness, defect types, and even your surroundings.
So, let’s break out our pads and polishers and dig into the steps involved in professional paint correction, from prepping surfaces to finishing touches. With a methodical plan of attack, you’ll be well on your way to giving every vehicle a showroom-like shine that keeps customers coming back time and again.
Surface Preparation
Before you think about paint polishing, you need to get the surface ready, and that means a thorough wash using the two-bucket method–one bucket for soapy water and another for rinsing. This trick prevents you from rubbing dirt back onto the car; it also keeps other contaminants from spreading and minimizes swirl marks. Pro Tip 1: Invest in a quality car wash soap with good lubrication to help reduce friction and protect the paint.
Next comes the clay bar treatment, which helps remove tiny contaminants like sap and brake dust. The key here is to use plenty of lubricant and work in straight lines, not circles, to keep things smooth and free from anything that could interfere with polishing. For cars that have been exposed to industrial areas or heavy pollution, you'll want to use an iron remover, too. These products break down those really small metal particles embedded in the paint that clay bars may have missed.
Understanding Paint Hardness
Some manufacturers use harder paint than others, and that affects how you approach the correction process. A paint meter, also known as a paint thickness gauge, tells you how much clear coat you have to work with and helps you decide whether to go light or aggressive with your approach to avoid damaging the paint.
The idea is to match your polish and technique to the paint hardness. Harder paints may need stronger, more abrasive compounds and pads, while softer paints do better with gentler products. Adjusting your speed, pressure, and the types of products you use will get you the best results while minimizing the risk of damage. Pro Tip 2: Test on a small, hidden area first to see which combination works best for each car.
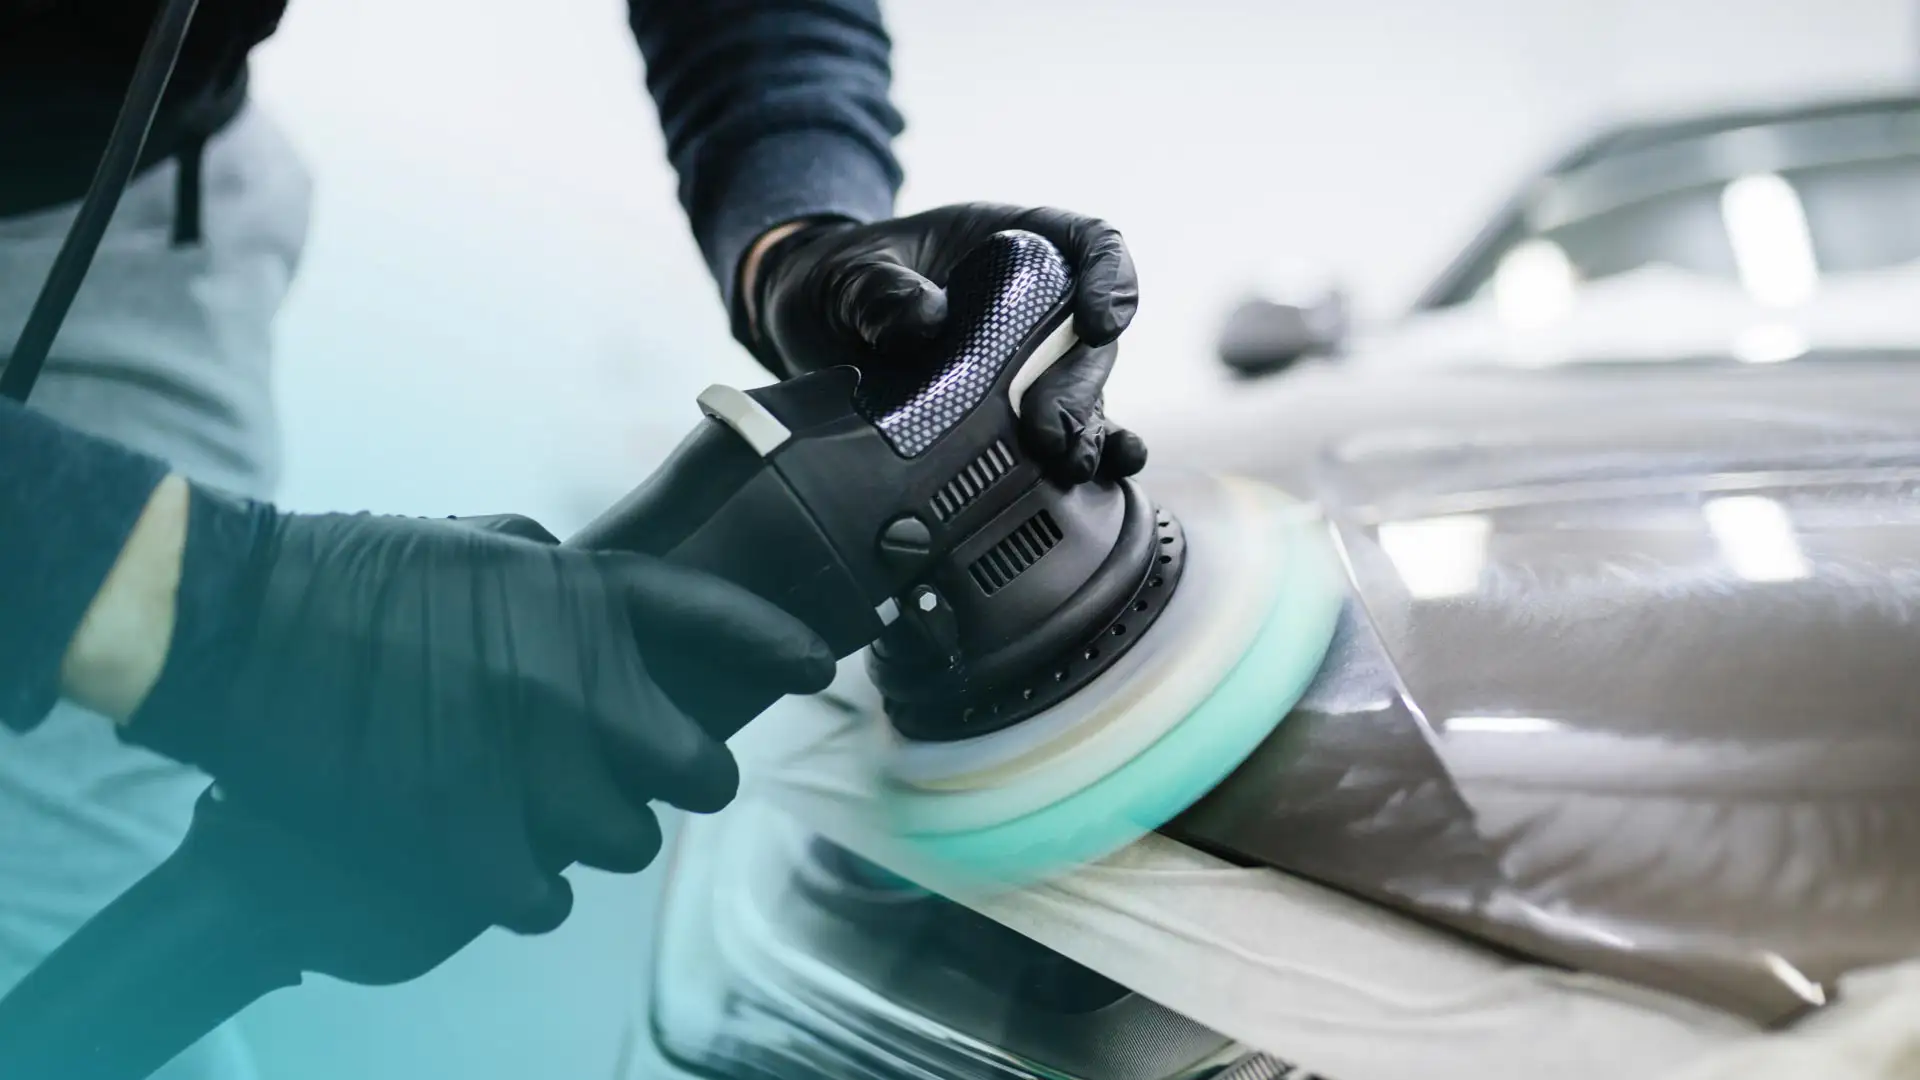
Picking the Right Pads
The right pads can make or break your work, so choose wisely. Denser pads have more cutting power and are great for dealing with big defects, while softer pads are better for finishing touches. In fact, a good finishing pad helps create a smooth, shiny finish without adding any new scratches. Also, pads with softer foam or microfiber finishes are ideal for enhancing the gloss and removing small imperfections after cutting. Just be sure to always keep your pads clean and in good condition; a dedicated pad brush or washer helps clear out any post-use buildup.
Tackling Different Defects
Swirl marks are a pain, but they can be corrected using rotary polishers, coarse compounds, and medium-density pads. This combo removes swirls quickly without damaging the paint. For scratches, dual-action polishers with fine compounds and soft pads work really well. The oscillating motion of the polisher actually helps prevent excessive heat buildup, which lessens your chances of damaging the paint. And holograms (those annoying light patterns some polishers leave behind) can be removed with finishing polishes and soft microfiber pads. Pro Tip 3: Go slowly and control your passes to get a smooth, even finish.
Managing Temperature
Temperature matters more than most people realize. For instance, if the paint gets too hot during polishing, you run the risk of damaging it. The surrounding temperature affects product performance and drying times, too. Warmer temps can dry products too quickly, while cooler ones might slow down the process. Adjust your approach based on the conditions. In warm weather, for example, it’s often best to work in smaller sections. You could also try using a cooling lubricant, or even a spray bottle or mister to cool things down.
Inspecting the Paint
You can only fix what you can see. Looking at the paint from different angles helps reveal hidden flaws, while varying your lighting setup can expose swirl marks, scratches, and other defects that might be invisible in normal light. If you really want to go top-shelf, a digital microscope lets you see tiny details in the paint, like fine scratches, pitting, or swirls, which can help you map out your correction work more precisely. But don’t overlook the value of a good touch test, either. Running your hand over the surface, especially with soft or sensitive paints, can help you feel imperfections that might have escaped the naked eye.
Compound & Polish Selection
Here’s where we get into the nitty gritty. Both the size and shape of the abrasive particles contained in your compounds and polishes will determine how effective they are. Larger, irregular particles cut more aggressively, while smaller particles give you a finer finish. Picking the right one helps you get that mirror-like shine. Meantime, the lubricants and additives in compounds reduce friction, allowing you to polish longer without generating too much heat. The right additives also help prevent burn-through on the paint. Pro Tip 4: Be sure to store all products properly by keeping them sealed and away from extreme temperatures.
Tips for Dark-Colored Vehicles
Dark cars tend to show every imperfection, no matter how small. In fact, they’re especially fond of holograms. Using finer polishes, light pressure, and soft pads can help prevent these unwanted effects and keep the paint looking sharp. Light scratches, also known as marring, can be treated with gentle polishes and soft pads. This lets you smooth out the paint without adding new imperfections. Good quality finishing polishes and waxes can make dark paint look incredibly deep and glossy, which your clients will love.
Aftercare & Maintenance
The job isn't over once you've corrected the paint. Protecting it is just as important. Apply a good sealant or ceramic coating to keep the paint free from contaminants and lock in your hard work. And, teach your customers how to maintain their car's new finish. Simple things like using proper wash techniques with a mild car soap, avoiding harsh chemicals like acid-based wheel cleaners, and steering clear of automatic car washes, if possible, can all help keep vehicles looking showroom-shiny for months.
Mastering Flawless Paint Correction
Mastering paint correction takes skill, the right tools, and plenty of repetition. Besides, the detailing industry is always evolving, with new products and techniques coming out all the time, so staying current will keep you ahead of the field. That includes joining online detailing communities, attending training courses, and practicing whenever you can. Every car is different, and each one teaches you something new, helping you refine your chops, build experience, and establish yourself as a true detailing virtuoso.
Paint correction can perfect a vehicle’s exterior, but Shopmonkey’s auto detailing software can help perfect your shop's operations. See how an all-in-one solution can streamline your workflow and grow your detailing business—request a demo today!